Obtaining a quote through your Sola dashboard is quick and simple. This guide walks you through each step of creating and sending a quote to your clients, along with an explanation of the information required at each stage.Overview
Get a Policy for Yourself. Consider purchasing a Sola policy for
yourself. Customers trust agents who can say, “I even bought one myself!”
Drawing on personal experience can significantly increase conversion rates
and establish credibility.
To create a new quote, log in to your Sola dashboard. Then click the “New Quote” button in the top-right corner. You can find this button on: Home Page Quote Page Policyholder Page Rewards Page The image below shows what the “New Quote” looks like on your home page.Starting Your Quote

Dashboard Overview
Master the Sola dashboard interface and discover all its features.
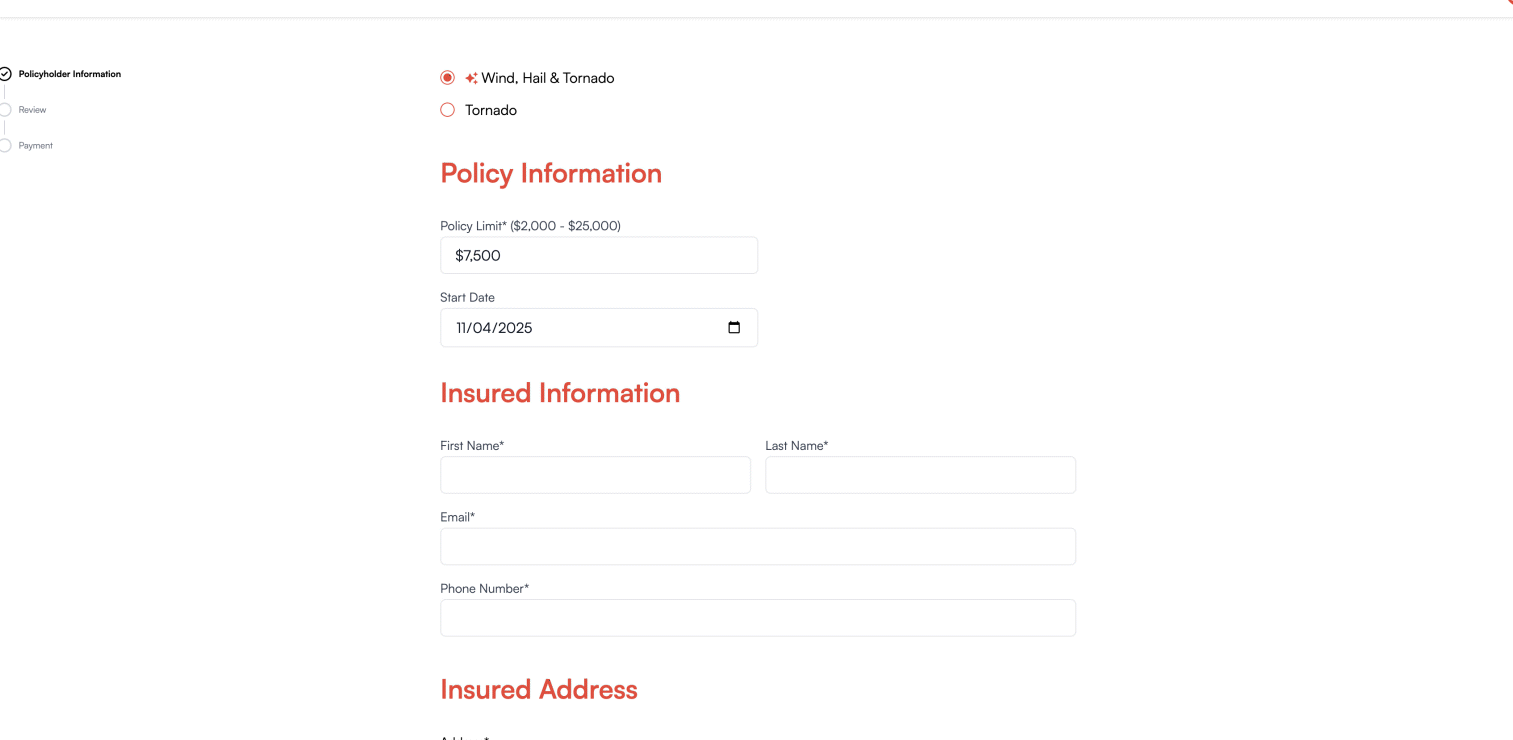
Once you’ve started your quote, you’ll need to select your policy details:Policy Type and Policy Information
Policy Type and Coverage Limits
Policy Type: Choose between two coverage options.- Wind + Hail + Tornado
- Tornado Only
Policy type options vary by
state. Some states may only
offer certain coverage types due to local regulations and market conditions.
Coverage Limit
Select the appropriate coverage limit for your customer’s needs based on the policy type:- Wind + Hail + Tornado: $2,000 - $25,000
- Tornado Only: $2,000 - $15,000
How to Pick the Limit
Take a consultative approach when helping customers select their coverage limit. Rather than rushing to a number, engage in a conversation to understand their unique needs and circumstances. Key Factors to Discuss:- Customer’s desired coverage level
- Wind and hail deductible on primary policy
- ACV vs. replacement cost considerations
- Scheduled payout structures
- Property value and risk exposure
- Budget considerations
Explaining the Sola Wind/Hail Policy
Get more tips and information on how to explain the Sola Wind/Hail policy to
your client.
Start Date
Choose when the policy should begin. Please note that Sola has a 5-day waiting period, which means the coverage effective date may differ from the start date if you select a date less than 5 days away.Planning ahead by selecting a start date more than 5 days out of the
purchase date ensures coverage begins immediately on that date with no
waiting period.

Policy Terms
Learn more about start dates and waiting periods.
After configuring your quote, you’ll need to provide the insured’s personal information and address details. This information is required to complete the quote process.Insured Information and Address
Insured Information
The Insured Information section collects the primary contact details for the policyholder. All fields in this section are required:- First Name: Enter the policyholder’s legal first name as it appears on their identification documents.
- Last Name: Enter the policyholder’s legal last name as it appears on their identification documents.
- Email: Provide a valid email address where policy documents and communications will be sent. This email will be used for all policy-related notifications.
- Phone Number: Enter a valid phone number where the policyholder can be reached. The number will be automatically formatted to (XXX) XXX-XXXX.
Ensure all information matches the policyholder’s identification documents
accurately. Incorrect information can lead to future coverage issues.
Insured Address
The Insured Address section collects the physical location of the property being insured. This address determines policy eligibility and pricing based on geographic risk factors. Required Fields:-
Address: Enter the street address where the property is located. Include the street number and street name.
By entering the address, the information selected in the dropdown will automatically complete the other required fields of the insured address.
- City: Enter the city where the property is located.
- State Code: Enter the two-letter state abbreviation (e.g., TX for Texas).
- County: Enter the county where the property is located. This is used for underwriting and risk assessment.
- Zip Code: Enter the five-digit ZIP code associated with the property address.
- Apt/Suite # (Optional): If the property is located in an apartment, suite, or unit, enter the unit number here. This field is optional and can be left blank for single-family homes.
- Check this box if the policyholder’s mailing address matches the property address. If left unchecked, you’ll be prompted to enter a separate mailing address where policy documents should be sent.
Double-check the address information before submitting, as incorrect
addresses can cause delays in quote processing or affect coverage
eligibility.
To send a quote, click the “Get Quote” button at the bottom of the new quote page. Below is an example of what the button looks like.Sending Your Quote

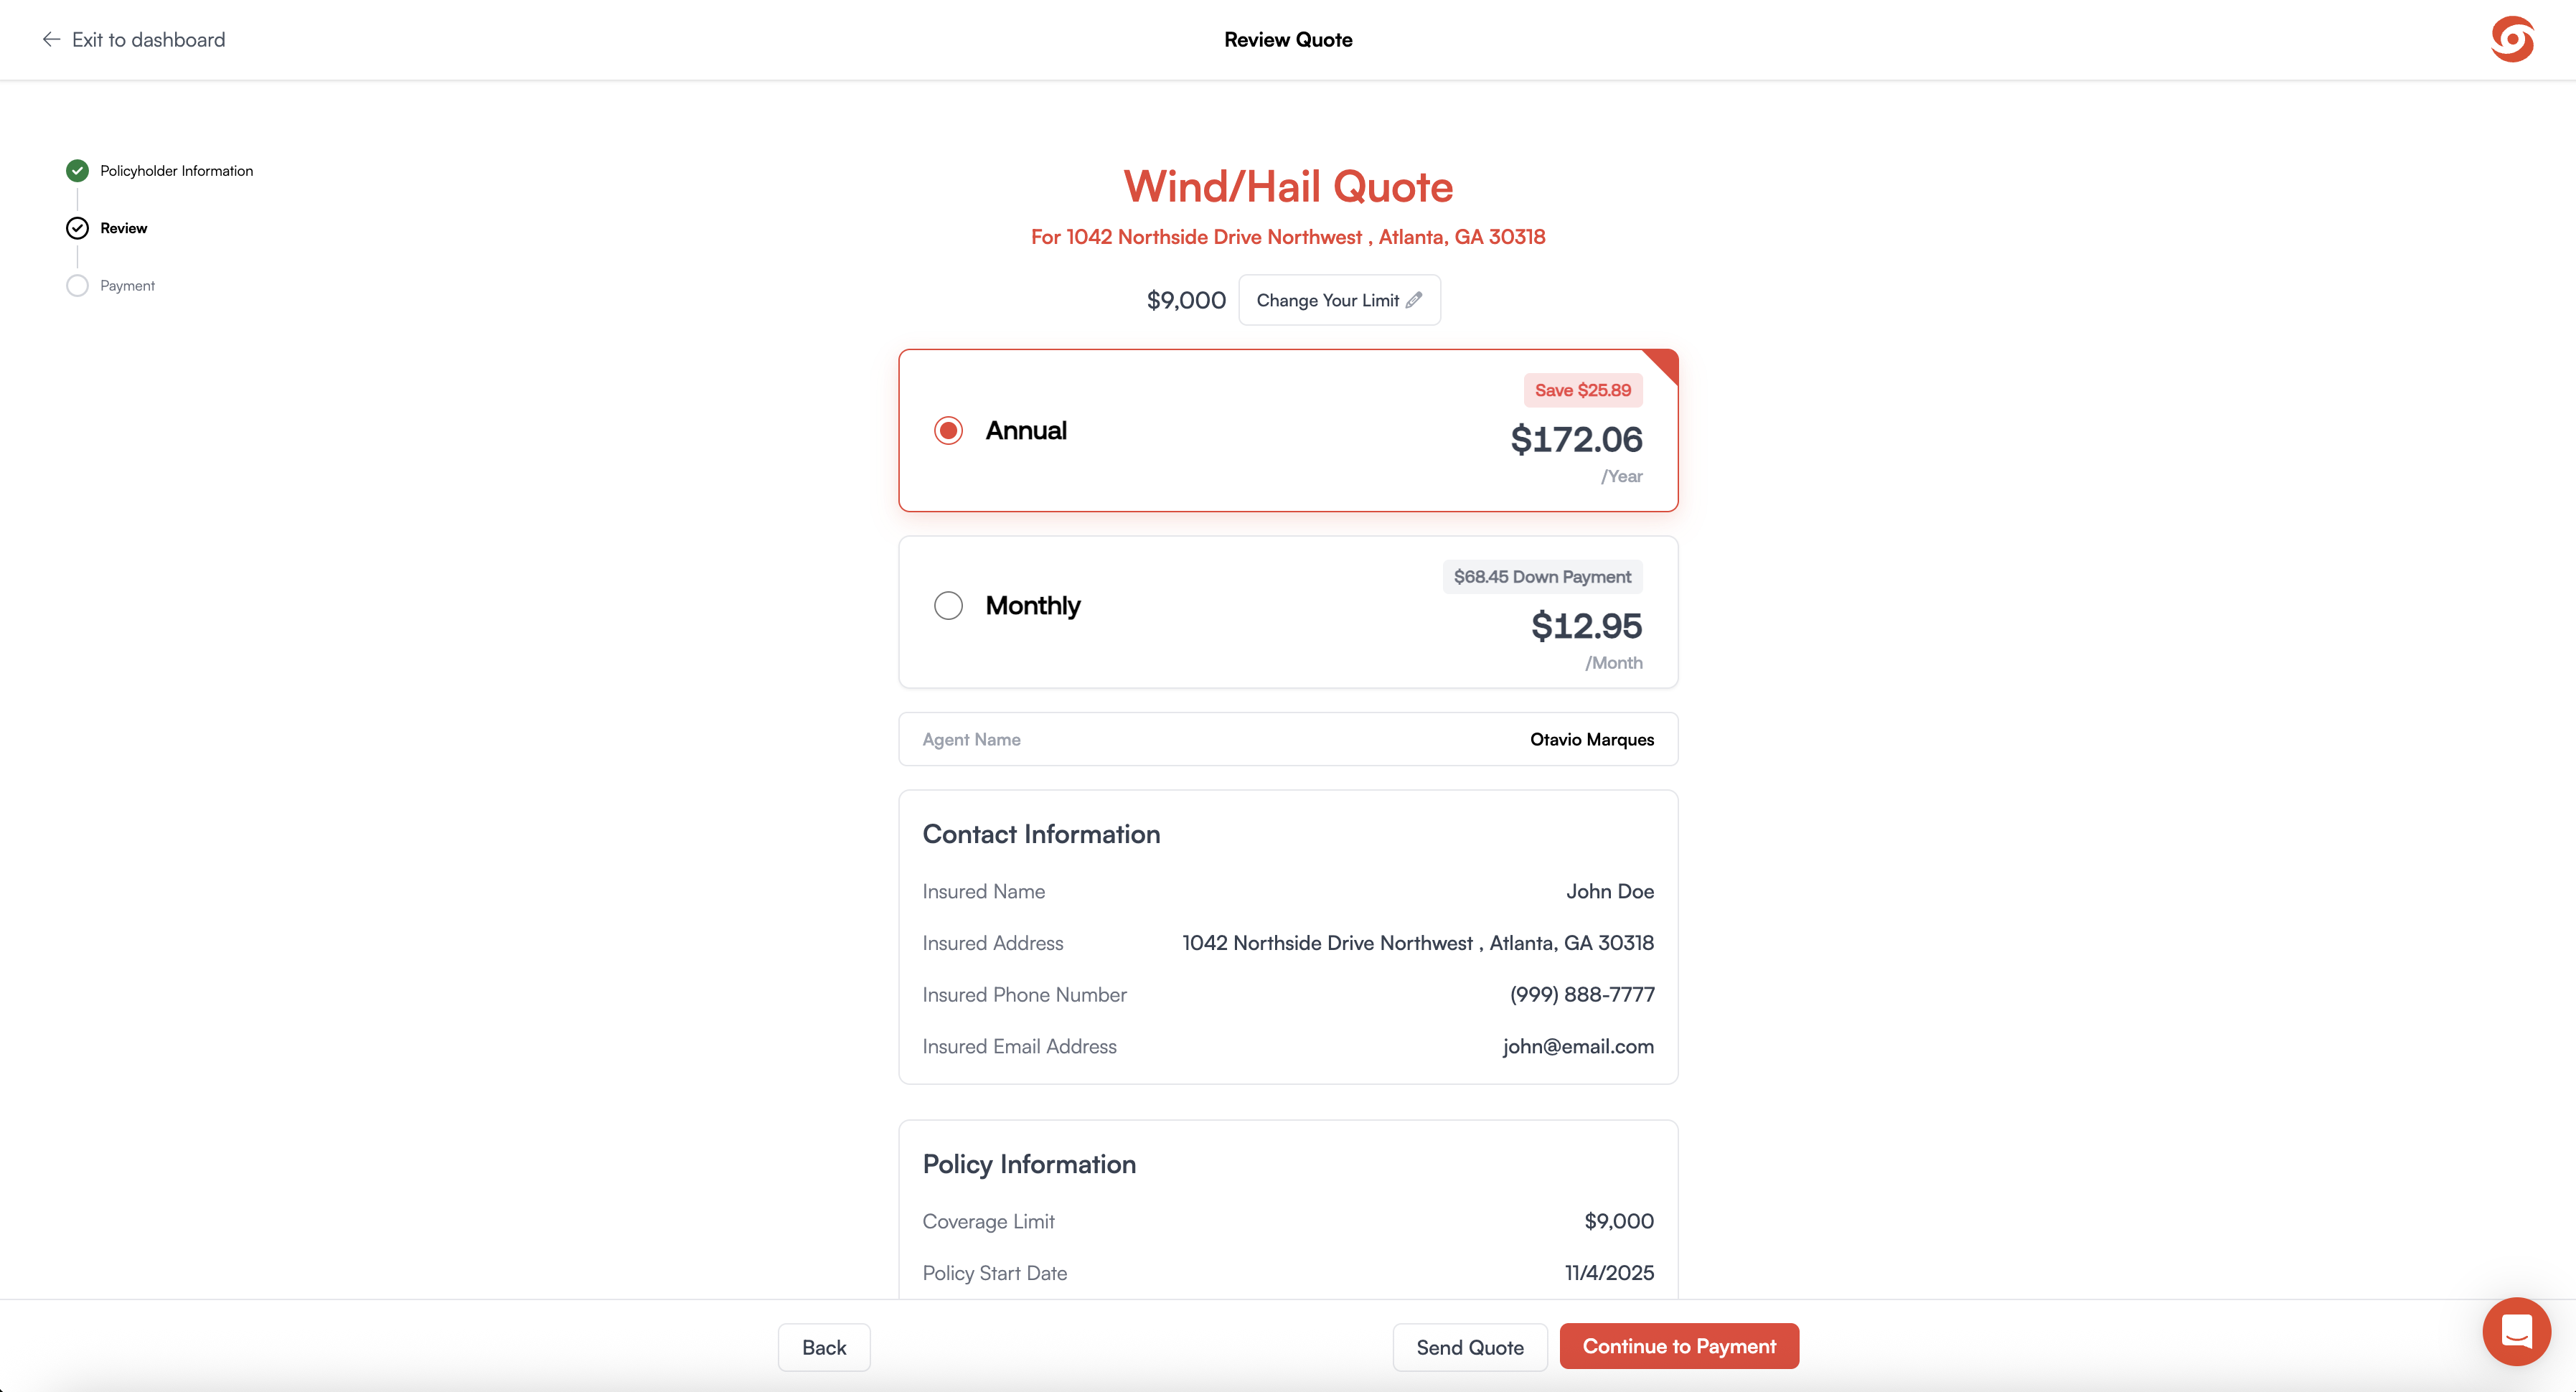
Payment Plans Overview
Learn more about how pricing options, such as annual and monthly payment
options.

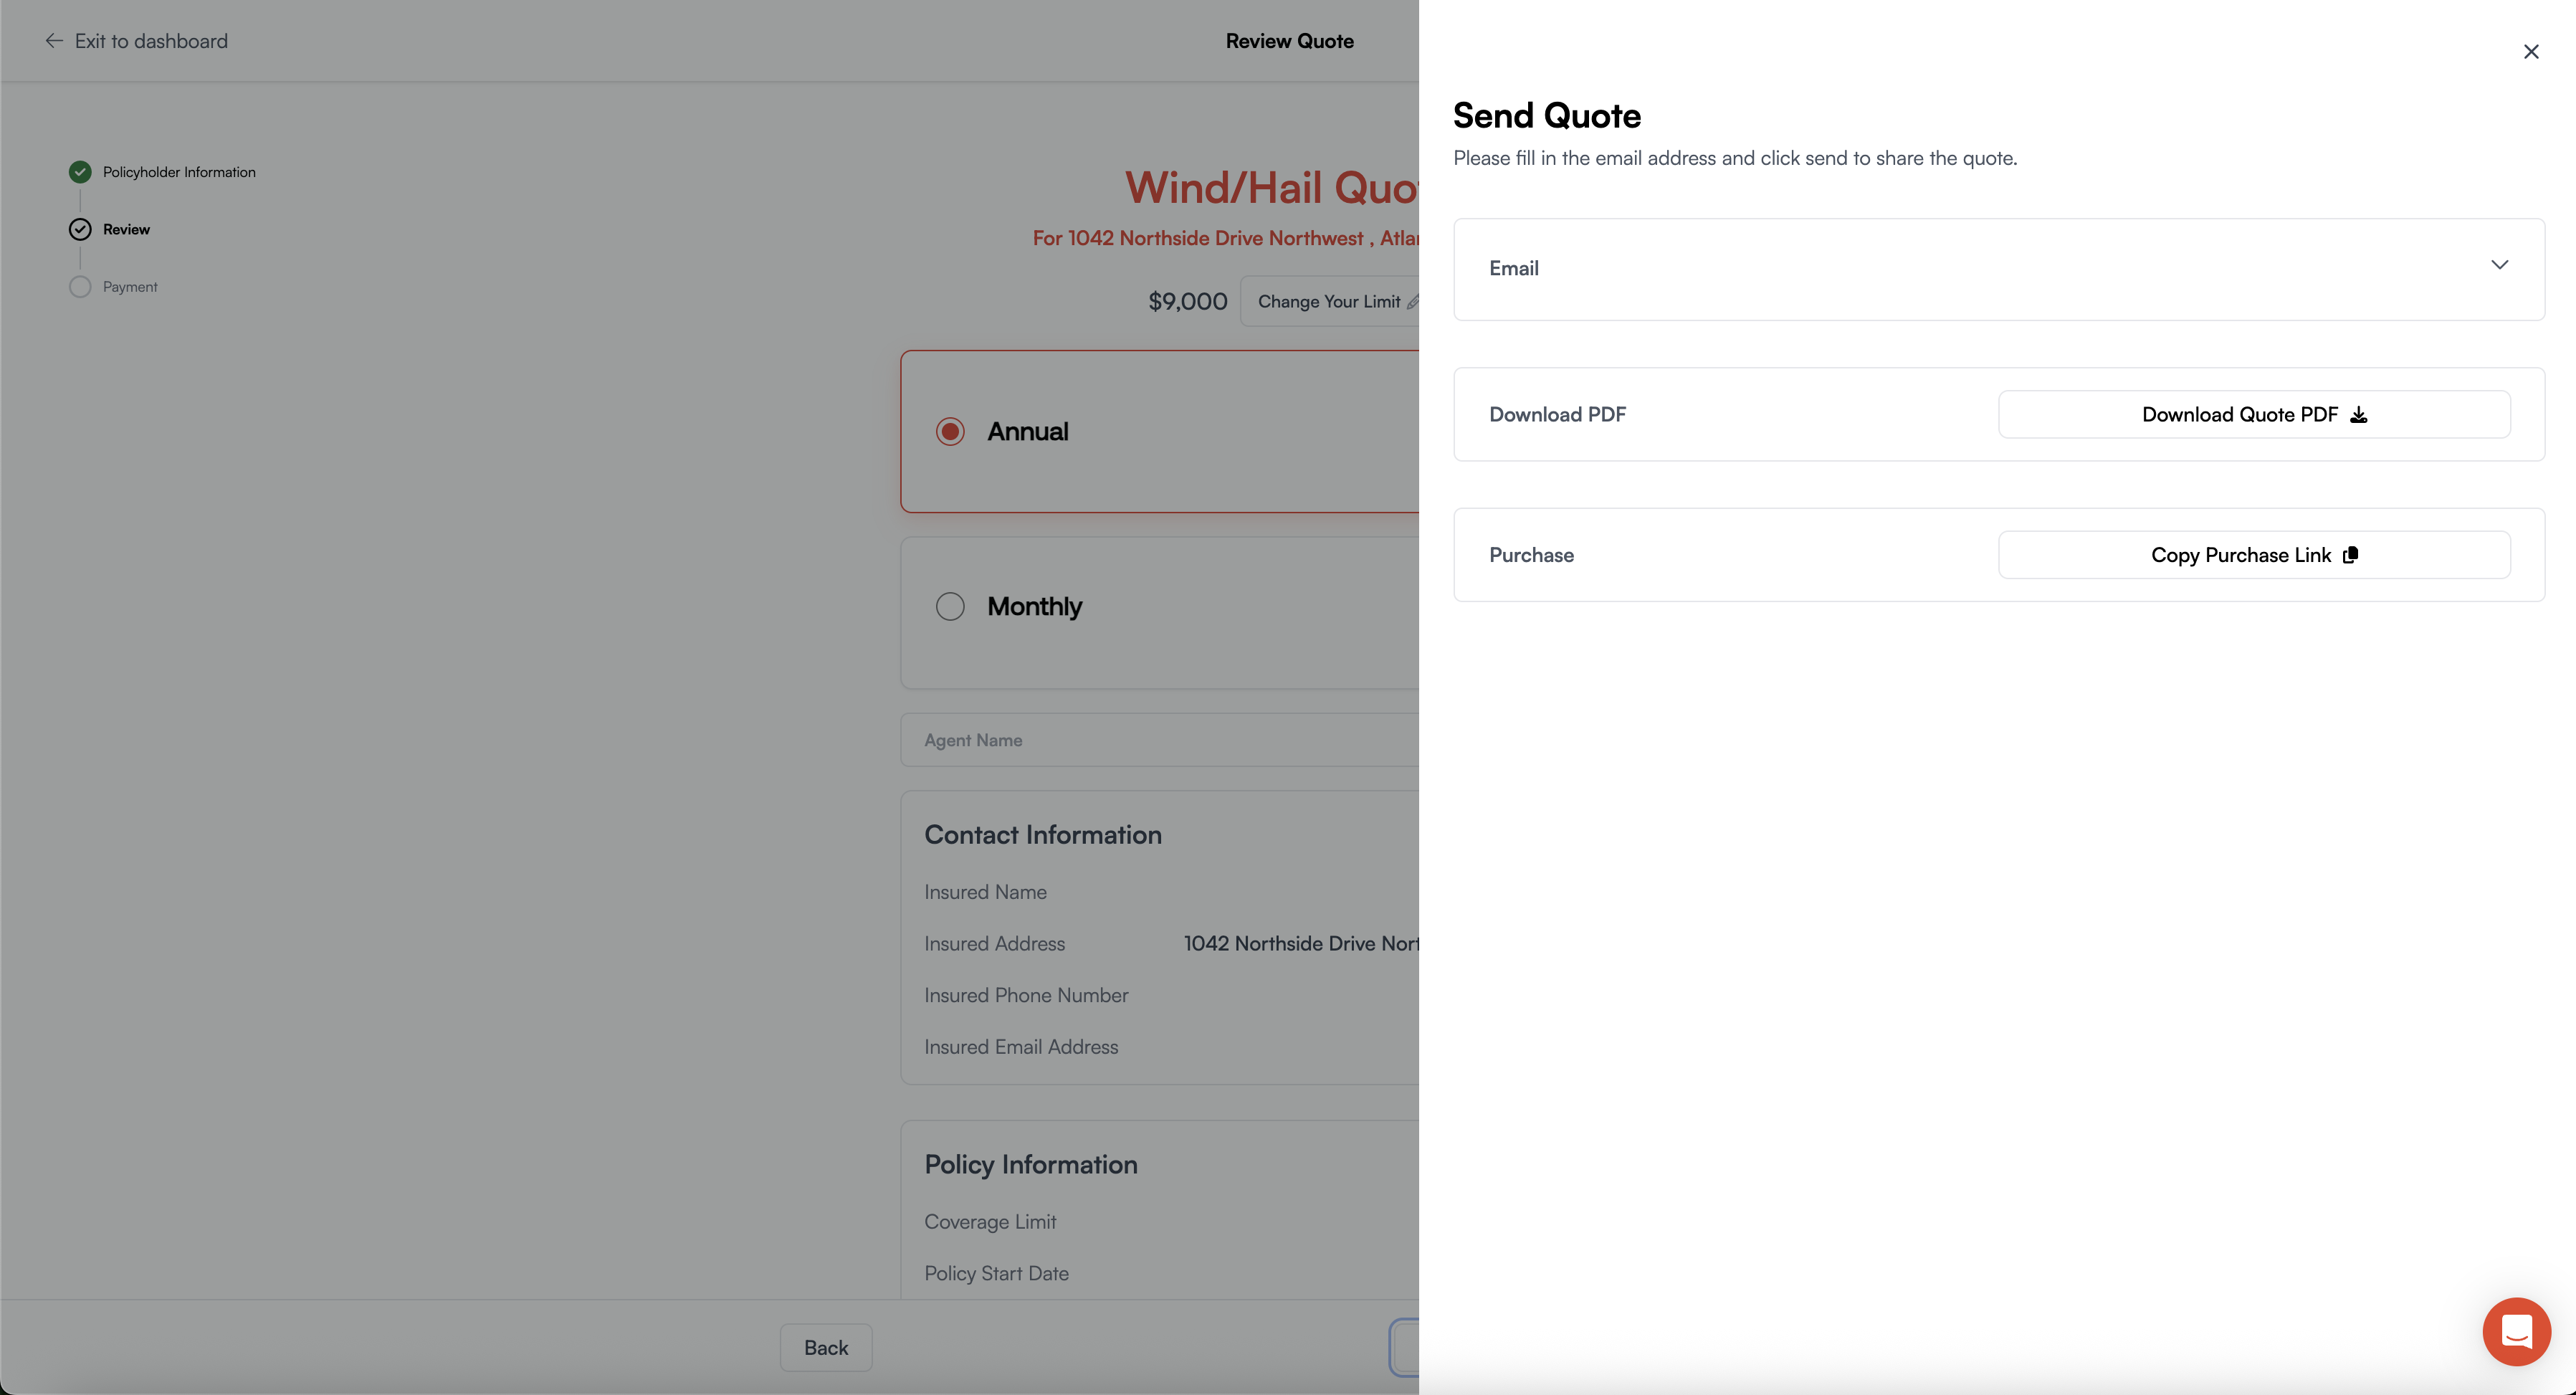
1. Purchase Link
Send a direct link that allows customers to review and purchase online. Purchase links never expire.2. PDF Download
Download a professional PDF version to print, share, or review yourself before sending to customers.3. Email
Send quotes directly to your customer’s inbox. By default, emails are sent from sola@solainsurance.com with professional Sola branding. You can optionally link your Google account to send from your own email address.Including your email helps make the message feel more personal, since
customers will know it’s coming from you, their agent.
For your first quote, try downloading the PDF to familiarize yourself with
how the quote looks from the customer’s perspective.
When sending quotes, consider including marketing materials to ensure
customers have comprehensive information about the policy. Marketing
materials help explain how Sola works and can answer common questions before
customers reach out.
Marketing Materials
Learn more about marketing materials, how to download, use, and more.
Explore More
Bind Your First Policy
Learn how to complete the binding process.
Navigate Dashboard
Master the Sola dashboard interface.
Rewards
Discover how to earn rewards for your sales.
How to Sell Sola
Master your pitch and handle objections.
FAQs
I see a red error message on an input field
I see a red error message on an input field
If any incorrect information is entered into an input field, a red error message will appear next to the corresponding field. Errors may occur due to several factor, including:
- Missing characters
- Incomplete information
- Invalid address
- Unsupported information
- Other validation issues
If you see a red message on an input field, double-check the information you entered and try adding it again. Review the specific error message for guidance on what needs to be corrected.
It won't let me enter certain states
It won't let me enter certain states
Sola is not yet available in all states. If you can’t select a particular state, it means:
- Your agency may not have permissions for that state
- Sola may not be licensed to operate in that state yet
Can I save a quote and come back to it later?
Can I save a quote and come back to it later?
Yes! As long as you select “get quote” after adding all the quote information. This quote will then appear on your quotes page, which you can then decide to edit, bind or send that quote.